Now let's add some automation of Prodyssey's Delay
parameter. First we have to do some setup tasks.
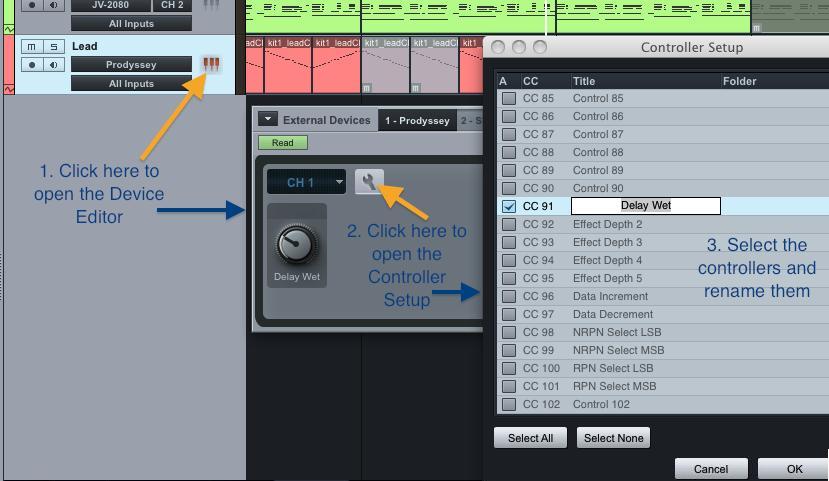
Open the Device Editor of the Prodyssey External Device
in Studio One and clean it up by removing all but one
knob.
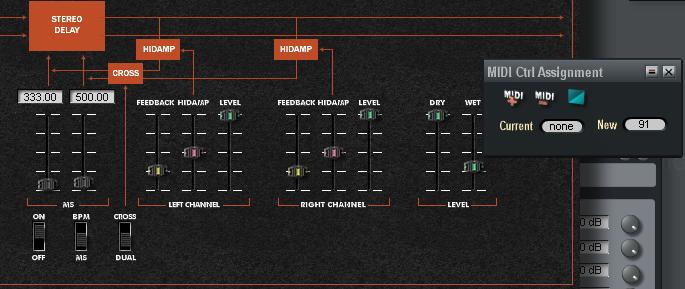
Right-click on the Delay Wet parameter in Scope's
Prodyssey GUI to open the MIDI Ctrl Assignment window.
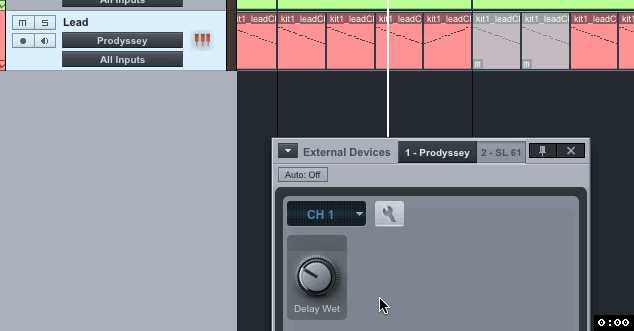
Move the knob in Studio One's Device Editor window so
that it sends its MIDI CC value to Prodyssey.
Click on the MIDI+ button in the MIDI Ctrl Assignment
window.
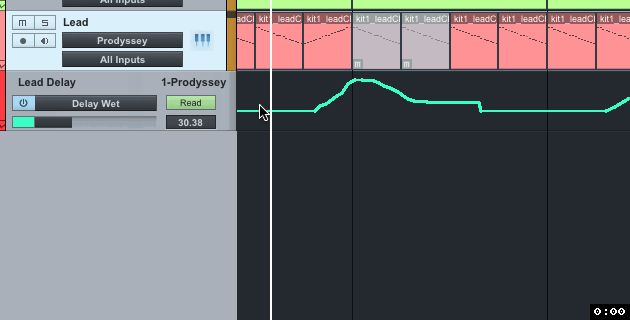
To write the automation data:
Add a new Automation Track by right-clicking in the delay parameter knob and selecting
Edit Delay Wet Automation from the menu.
Then set the
Automation mode to Touch and start the playback.
Now move
the knob with the mouse to add automation points.
These can
be edited afterwards.
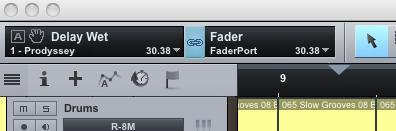
You can also assign a fader or knob of your hardware
MIDI controller to a parameter you want to automate.
This is done with the Control Link feature of Studio
One. Simply move the parameter's knob in the
Device Editor and then the control on your external
controller. Both controls should now be
displayed in the Control Link parameter box in the
upper left corner of the Studio One window. Click on
the chain icon to link these two.
So instead of using the mouse you can now move the
controller's fader or knob to write automation data.
I've used the fader of the FaderPort in this example
to re-write the delay automation.
To playback the automation data set the mode to
Read.